How to Setup the VividLite Shadowbox
Plug all of the shadowbox lights in using the provided charger cables. You'll need to charge all of the batteries. This can take up to 8 hours+ so please allow plenty of time before your party.The shadowbox lights can be controlled by either the included remote control, or through a smart phone (Apple or Android) using the 'ShadowBox by VividLite' app.
To Control with Your Smart Phone or Tablet:
1) Download the app from either the Apple Store or Android Play store by searching for "ShadowBox by VividLite", then proceed to install the app to your phone. The app is free and lets you turn your smartphone or tablet into a personal lighting controller.2) Once the app is installed, plug the ShadowHub in. You need to connect your phone or tablet to the ShadowHub. To do that, go to your wifi settings and connect to the network "ShadowHub". The password to connect is: "88888888".
3) Next, turn all of the Shadowbox lights on. The power button is the silver circle shaped button on the black metal frame. It should glow blue if powered on successfully.
4) With all of the Shadowbox lights on, open the App on your phone (which should be connected to the ShadowHub network). Press the gear icon to access settings. The press the "Pair" button to scan for the lights.
5) After the scan is complete, press the blue arrow to go back to the main control screen in the app. Select one of the lights each will be labeled some random numbers/letters like 04a9. You can press the power icon to turn on the the light, and press on the whole row to control that indivual light.
6) If you want to control all of the lights simultaneously, you need to create a "group". If you scanned all of the lights at the same time, it should automatically add to the same group. If not, drag each light into the icon labeled "group".
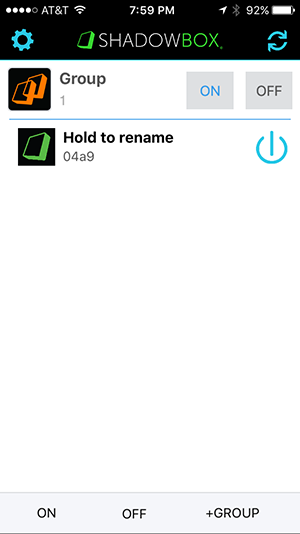
7) Once grouped, then clicking on the Group will allow you to control all of the lights at the same time.
To Control with the Remote Control
If you just want to have the lights on one single color for your entire event, the easiest way to go is to use the included remote control. This also serves as a great backup if you have trouble connecting to the ShadowHub network.1) Power on a ShadowHub light. The power button is the silver circle shaped button on the black metal frame. It should glow blue if powered on successfully.
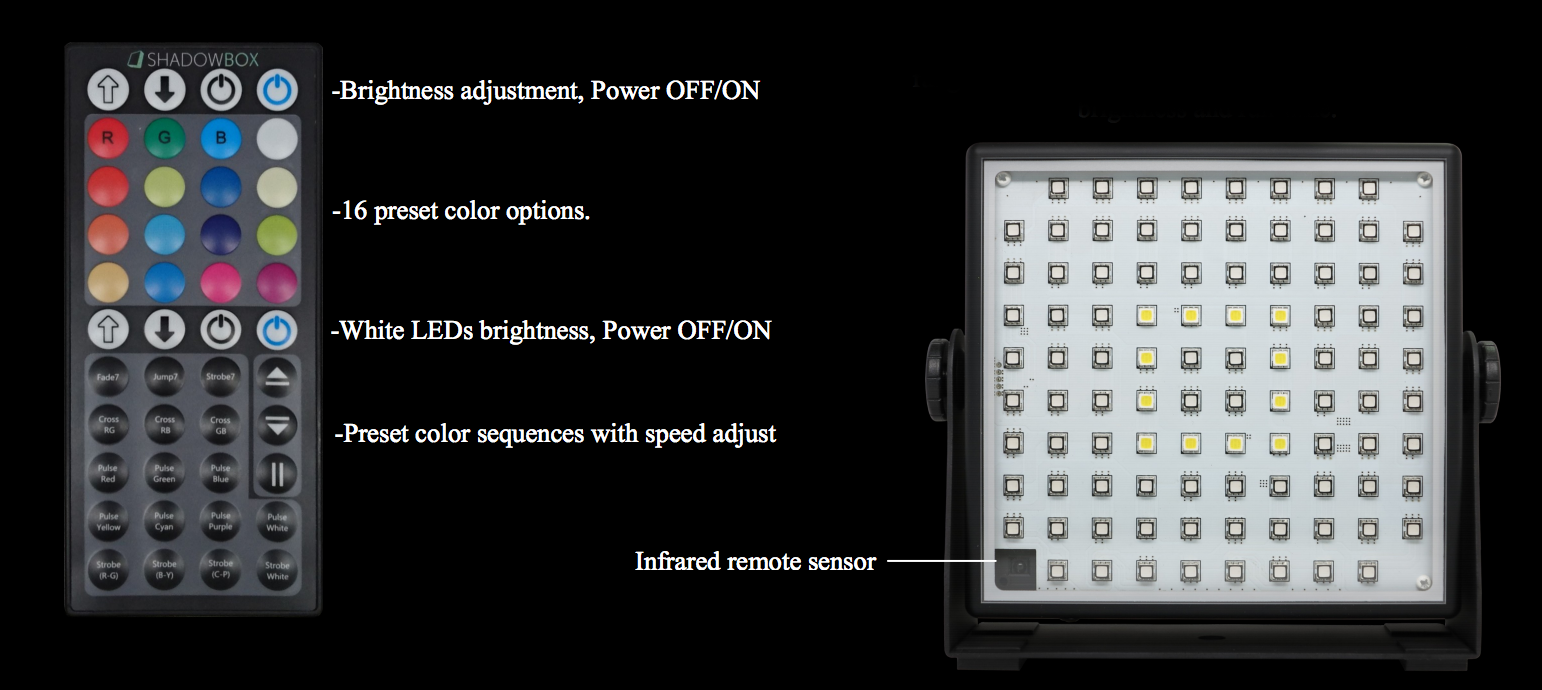
2) On the remote control, press the blue power icon in the upper right hand corner (see photo). You must have the remote control pointed directly at the infared remote sensor built-into the ShadowBox. You have to be pretty close to the fixture to get this to work. It does take a second to power on, please don't panic and jam on the buttons. Gently hold the power button on the remote control down while pointed directly at the infared remote sensor. You'll know when its working because the fixture will light up.
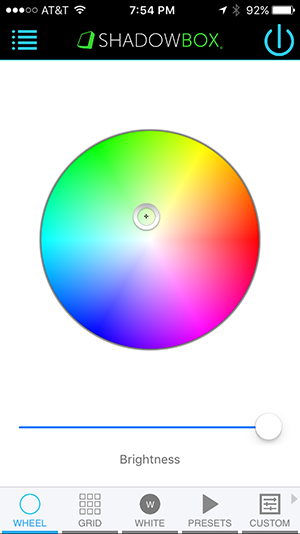
3) Press any of the colored buttons on the remote control to change to that color. You can also play around with the other features on the remote control like dimming, fades and strobes.
4) Repeat for each of the Shadow Box lights.
After Your Event
1) Pack all of the lights, charging cables, remote controls and the Shadow Hub neatly back into the original boxes they arrived in.2) Place the provided UPS return shipping label over the old shipping label on the boxes (please make sure the old label is completly covered), and drop the boxes off to any UPS Store or drop-up location. If you can't find your return shipping label, please email [email protected] for assistance, or use the contact form